59 lines
2.2 KiB
Markdown
59 lines
2.2 KiB
Markdown
---
|
||
id: "2018-08-13-10-38"
|
||
title: "springboot搭建"
|
||
headWord: "前面的博客有说到spring boot搭建见另一篇博文,其实那篇博文还没写,现在来填个坑。我们使用spring initializr来构建,idea和eclipse都支持这种方式,构建过程类似,这里以idea为例,详细记录构建过程。"
|
||
tags: ["java", "spring","springboot","idea"]
|
||
categories:
|
||
- "java"
|
||
- "spring boot学习"
|
||
---
|
||
|
||
  前面的博客有说到 spring boot 搭建见另一篇博文,其实那篇博文还没写,现在来填个坑。我们使用 spring initializr 来构建,idea 和 eclipse 都支持这种方式,构建过程类似,这里以 idea 为例,详细记录构建过程。
|
||
|
||
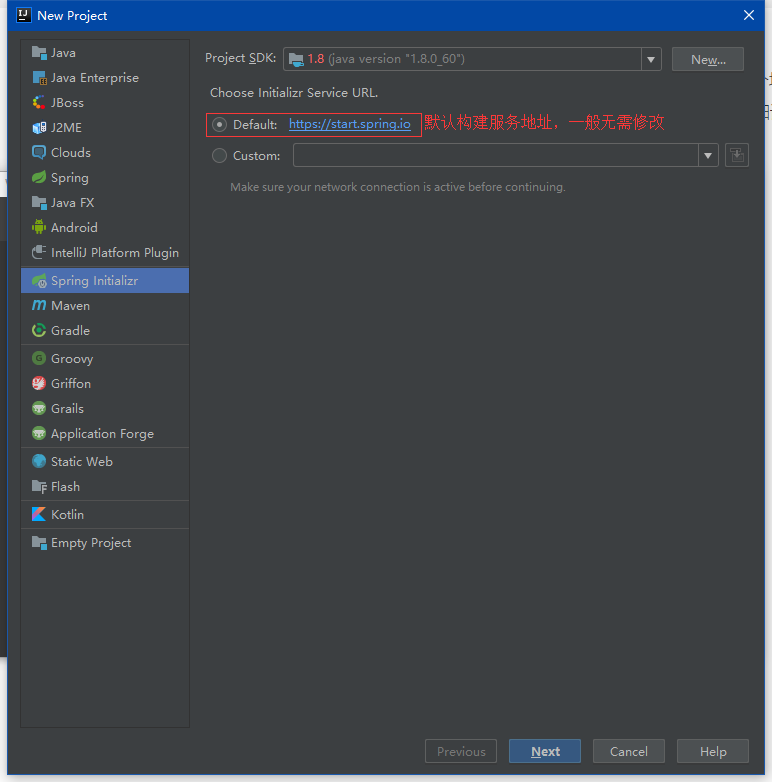
### 1.选择 spring initializr
|
||
|
||
|
||
|
||
next
|
||
|
||
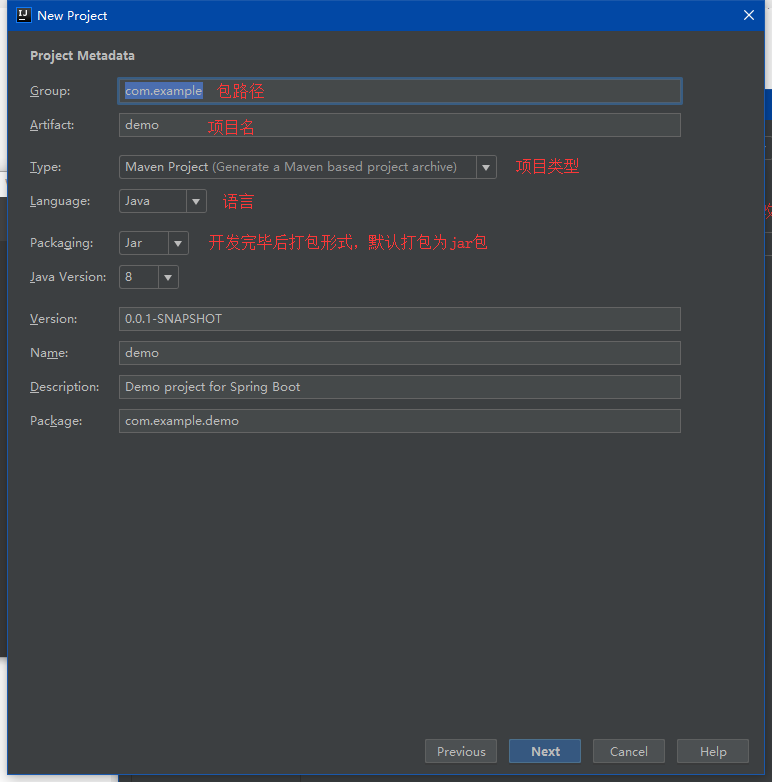
#### 2.设置参数
|
||
|
||
|
||
|
||
next
|
||
|
||
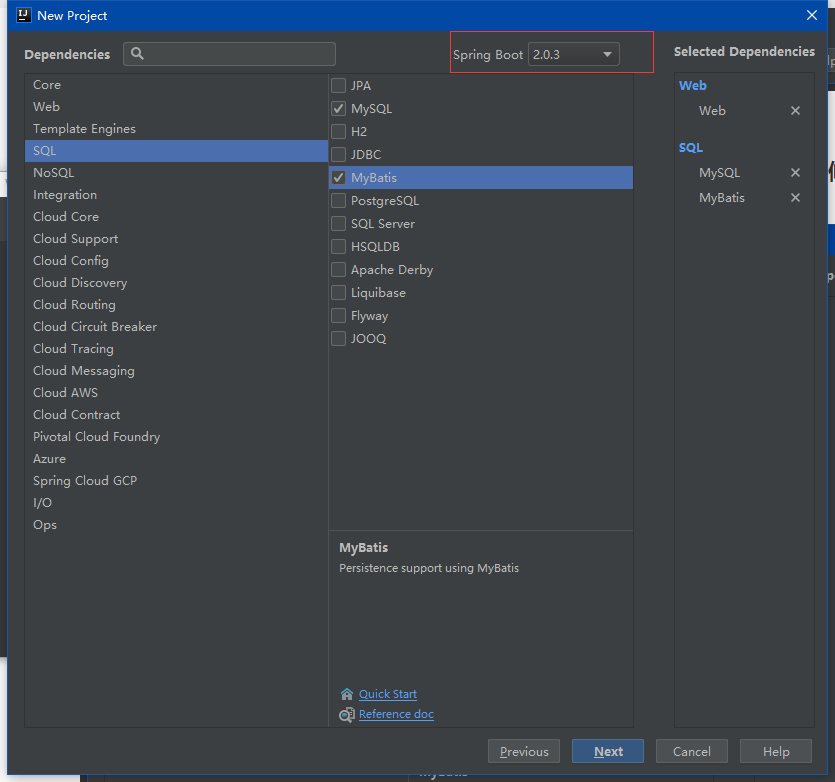
#### 3.选择依赖
|
||
|
||
  在这里选择 spring boot 版本和 web 依赖(忽略 sql 的依赖,如有需要[点击这里](f),单独将 mybatis 的整合),后面也可手动编辑 pom 文件修改增加删除依赖
|
||
|
||
|
||
|
||
这里我们选择 web 搭建一个简单的 REST 风格 demo。然后 next。
|
||
|
||
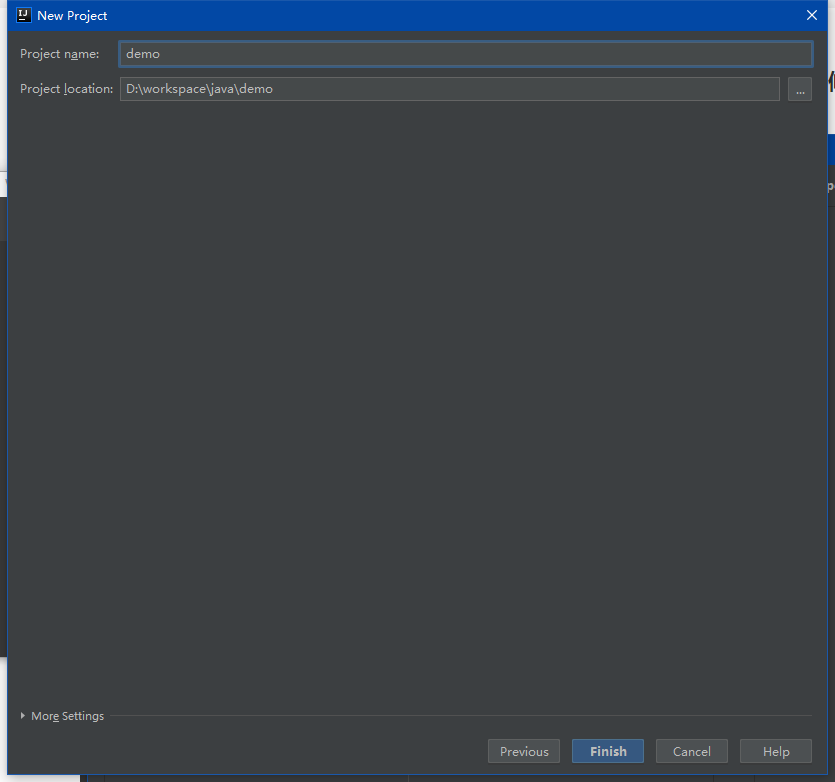
#### 4.设置项目存放地址
|
||
|
||
|
||
|
||
这样就成功构建了一个 springboot 项目。
|
||
|
||
#### 5.测试
|
||
|
||
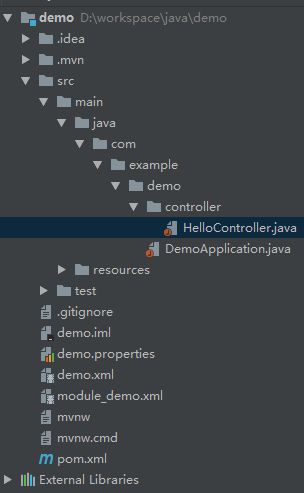
  现在新建一个 controller 包,包下新建一个 HelloController,创建之后项目目录结构如下:
|
||
|
||
|
||
|
||
HelloController 代码如下:
|
||
|
||
```java
|
||
@RestController
|
||
@RequestMapping("/home")
|
||
public class HelloController{
|
||
@GetMapping("/hello")
|
||
public String sayHello(){
|
||
return "hello";
|
||
}
|
||
}
|
||
```
|
||
|
||
然后运行项目,访问 [localhost:8080/home/hello](localhost:8080/home/hello) 即可看到 hello 字符串。
|