126 lines
4.4 KiB
Markdown
126 lines
4.4 KiB
Markdown
---
|
||
id: "2019-03-03-15-42"
|
||
date: "2019-03-03-15-42"
|
||
title: "docker实现hexo博客自动部署,实时更新"
|
||
tags: ["docker", "hexo", "next", "webhook"]
|
||
categories:
|
||
- "其他"
|
||
---
|
||
|
||
## 一、背景
|
||
|
||
  你是否有过想要搭建一个hexo博客,但是看着那冗长的教程,唉声叹气?
|
||
  你是否因为每次发布新的博文,都要重新构建,部署而逐渐放弃写博客?
|
||
|
||
  现在解决有了完美的解决办法了,一键构建,无需进行复杂的配置,开箱即用。同时支持github的webhook来实现实时构建,只需就行一次push操作,便能自动重新构建发布,无需手动操作。
|
||
|
||
  详见[hexoBlog自动构建](https://github.com/FleyX/hexoBlog)
|
||
|
||
使用方法:
|
||
|
||
## 从 github 克隆本仓库
|
||
|
||
```bash
|
||
git clone git@github.com:FleyX/hexoBlog.git
|
||
```
|
||
|
||
## 基本配置
|
||
|
||
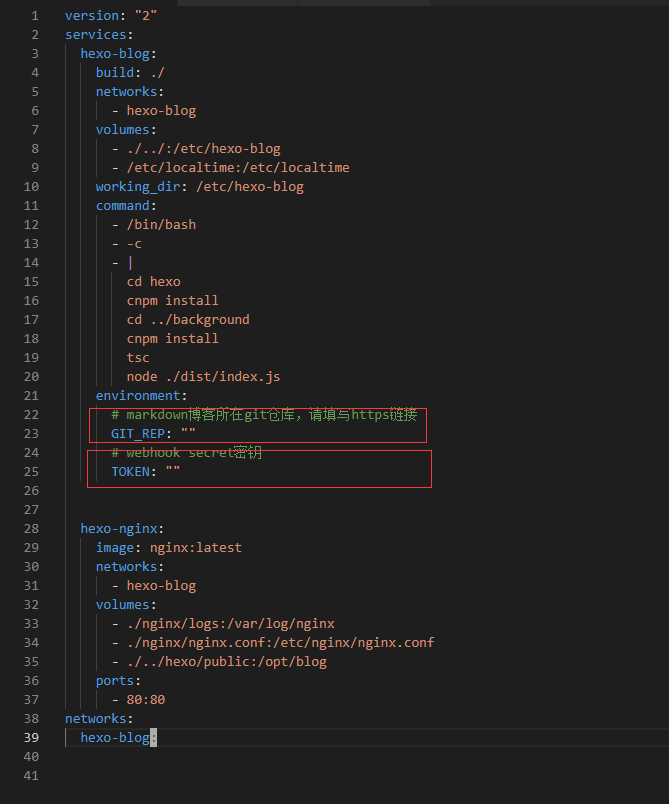
1. 修改`docker/docker-compose.yml`文件,指定博文所在 gihub 仓库和 webhook 密钥.
|
||
|
||
|
||
|
||
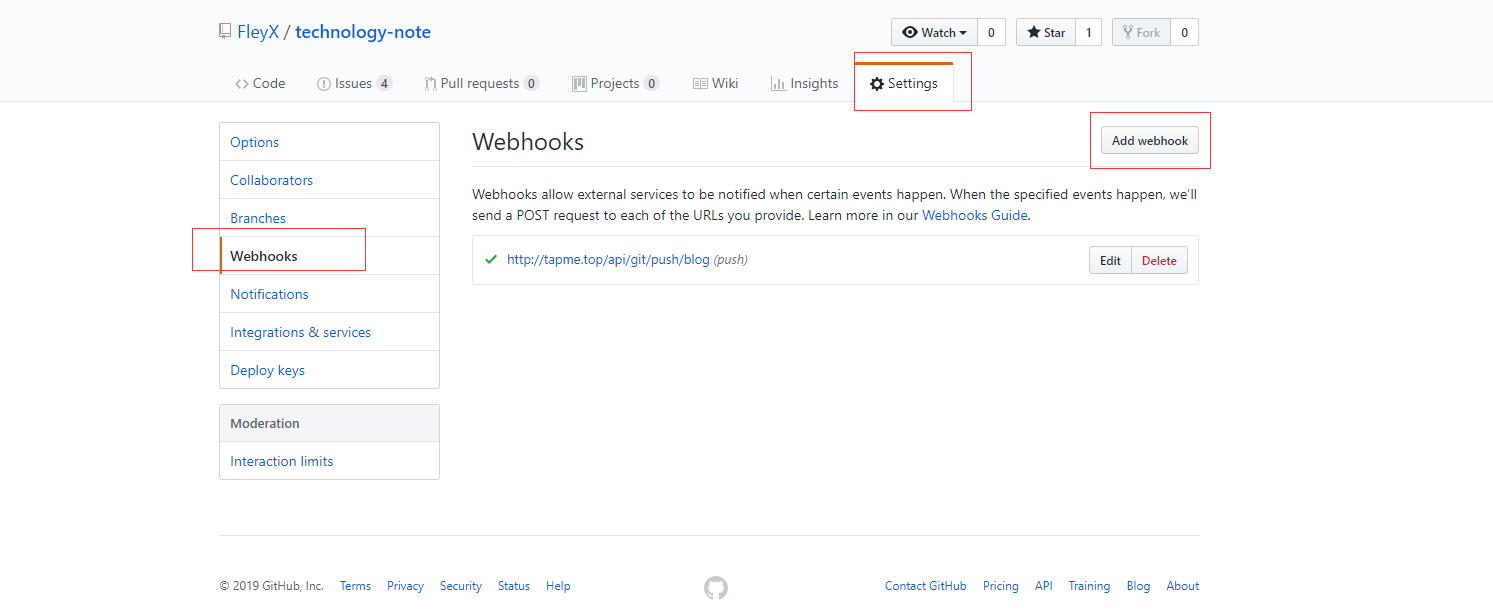
**github配置webhock步骤如下:**
|
||
  以我的博文仓库(technology-note)为例:
|
||
|
||
- 新增一个webhook
|
||
|
||
|
||
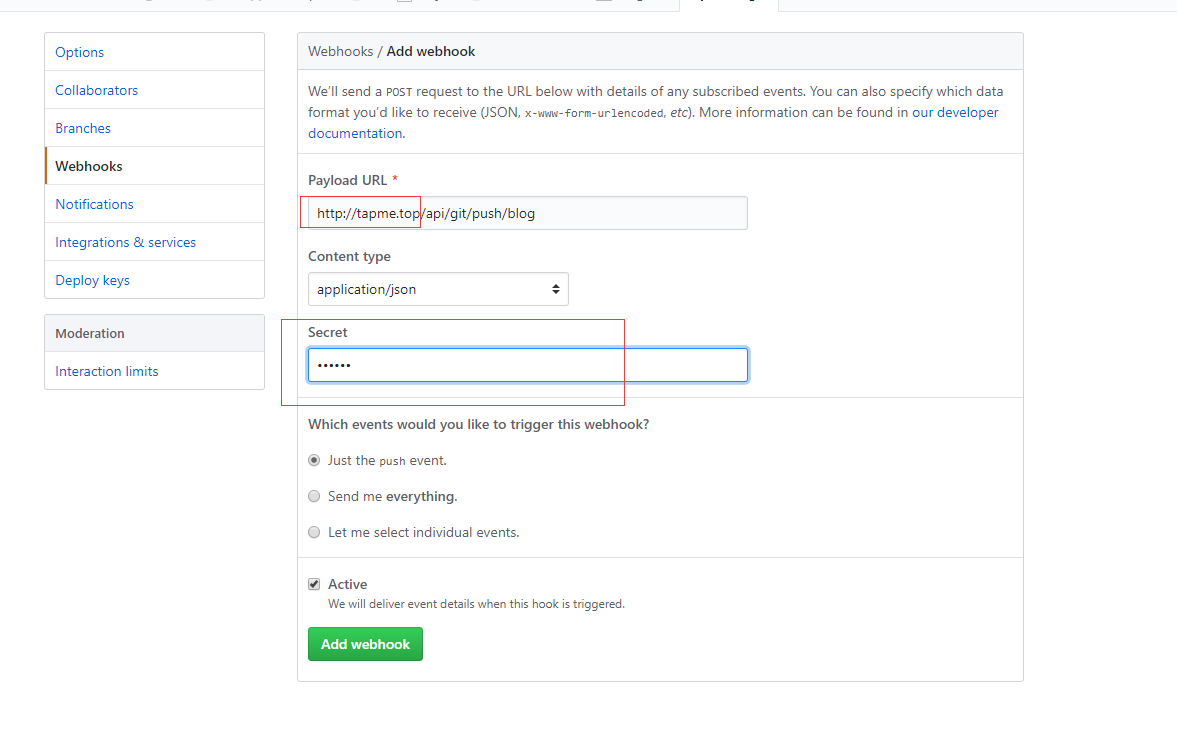
- 配置webhook
|
||
|
||
|
||
  将url的地址换为你的服务器地址,然后设置secret密钥,就OK了。再将密钥设置到docker-compose.yml中即可。
|
||
|
||
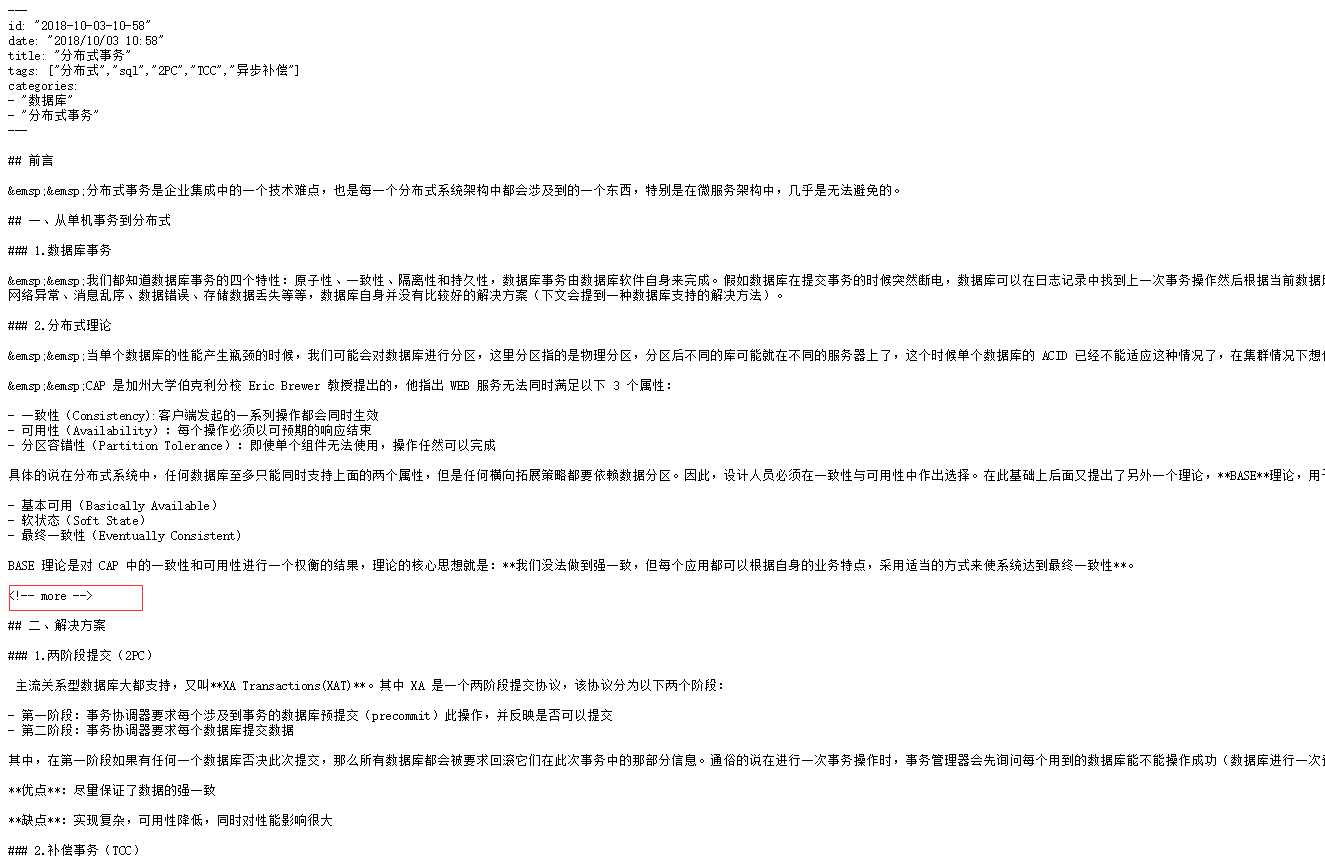
2. 博文 markdown 文件编写规范,详情参见[分布式事务.md](https://raw.githubusercontent.com/FleyX/technology-note/master/%E6%95%B0%E6%8D%AE%E5%BA%93/%E5%88%86%E5%B8%83%E5%BC%8F/%E5%88%86%E5%B8%83%E5%BC%8F%E4%BA%8B%E5%8A%A1.md):
|
||
|
||
<!-- more -->
|
||
|
||
```yaml
|
||
---
|
||
id: "2018-10-03-10-58"
|
||
date: "2018/10/03 10:58"
|
||
title: "分布式事务"
|
||
tags: ["分布式", "sql", "2PC", "TCC", "异步补偿"]
|
||
categories:
|
||
- "数据库"
|
||
- "分布式事务"
|
||
---
|
||
|
||
```
|
||
|
||
参数含义如下:
|
||
|
||
- id:博文 id,博文链接也会使用这个值
|
||
- date: 博文创建日志
|
||
- title: 博文标题
|
||
- tags: 文章标签
|
||
- categories: 文章分类,支持多级分类,第一个最高级依次降低
|
||
|
||
  如果想实现首页概览,秩序在想要展现的部分下加上`<!-- more -->`,如下所示:
|
||
|
||
|
||
|
||
3. 在 docker 目录下,执行`docker-compose up -d`,完工,访问服务器 IP 或域名即可看到效果。(注意首次部署可能会很慢,取决于网络情况和服务器配置)。
|
||
|
||
## 详细配置
|
||
|
||
  上图只是基本配置,下面是常用的配置:
|
||
|
||
### 设置文章永久链接
|
||
|
||
  编辑`hexo/_config.yml`下 16,17
|
||
|
||

|
||
|
||
如果部署在根目录下,将 url 设置为`服务器域名`,root 设置为`/`
|
||
如果部署在 test 路径下,将 url 设置为`服务器域名/test`,root 设置为`/test`
|
||
|
||
### 设置站点信息
|
||
|
||
  编辑`hexo/_config.yml`下 6-10 行,设置博客标题,子标题,关键词,作者等信息
|
||
|
||
```yaml
|
||
title: Hexo
|
||
subtitle: To strive, to seek, to find, and not to yield.
|
||
description: To strive, to seek, to find, and not to yield.
|
||
keywords: ["java", "node", "html", "javascript"]
|
||
author: fleyX
|
||
```
|
||
|
||
**注意下面的都是配置主题的配置文件,位置`themes/_config.yml`,本博客使用的 Next 主题,其他主题的配置可能不一样**
|
||
|
||
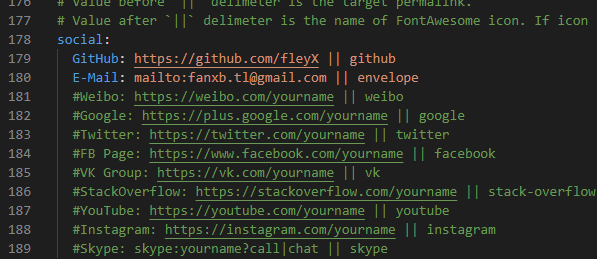
### 设置社交信息
|
||
|
||
  编辑第178行social下项目:
|
||
|
||
|
||
|
||
### 设置打赏
|
||
|
||
  编辑327行reward下属性,设置支付宝/微信收款图片,可将图片放到`hexo/source/static/img`目录下。
|
||
|
||

|
||
|
||
### 集成gitment评价
|
||
|
||
  建议百度如何配置gitment,这里默认你已经会完毕,拥有id和secret。编辑570行,设置enable为true,然后加入你的信息:
|
||
|
||

|
||
|
||
### 集成cnzz统计
|
||
|
||
  设置635行,cnzz id即可
|
||
|
||

|
||
|
||
其他更加详细配置参看官方文档。 |