95 lines
3.4 KiB
Markdown
95 lines
3.4 KiB
Markdown
---
|
||
id: "20190628"
|
||
date: 2019/06/28 10:58:00
|
||
title: "从零开始react实战:云书签2-登录、注册、重置密码功能前后端实现"
|
||
tags: ["react", "antd", "less", "create-react-web"]
|
||
categories:
|
||
- "前端"
|
||
- "react"
|
||
---
|
||
|
||
总集篇:[react 实战之多人聊天室](https://blog.fleyx.com/blog/detail/20190625)
|
||
|
||
上一篇搭建了 reat 的环境,本篇正式开始编码了。先实现以下三个通用功能:
|
||
|
||
- 注册
|
||
- 登录
|
||
- 重置密码
|
||
|
||
鉴于本人设计水平有限(抠脚),所以这三个页面的风格将参考简书网页版。
|
||
|
||
## 模板编写
|
||
|
||
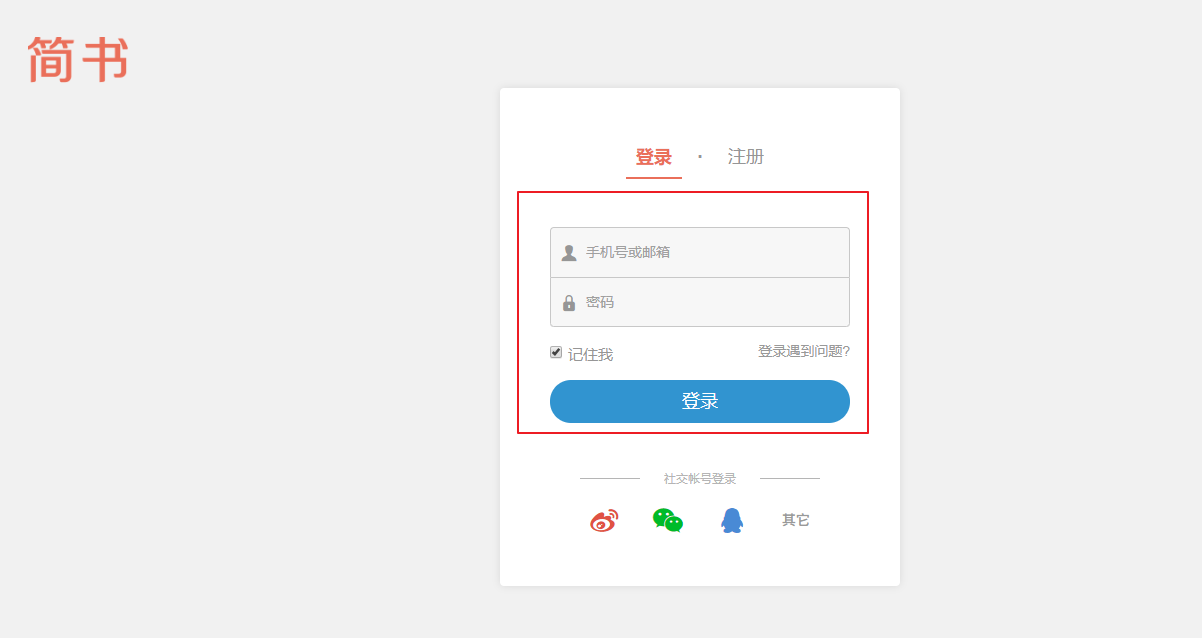
打开简书的注册页和登录页发现结构都是一样的,背景加上中间的输入框,如下图所示:
|
||
|
||
|
||
|
||
观察登录、注册两个页面的结构可以发现真正变化的部分只有中间的表单,所以我们可以将表单外的其他部分作为一个公共布局给这些页面来复用。
|
||
|
||
<!-- more -->
|
||
|
||
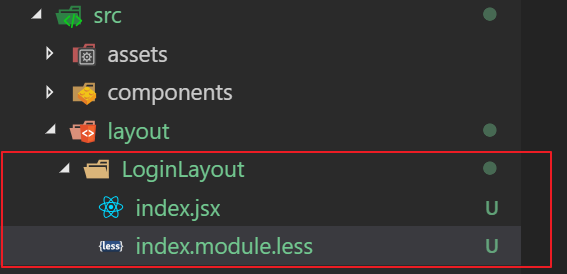
创建`src/layout/LoginLayout`目录,然后在目录下建立`index.jsx`,`index.module.less`文件,如下图所示:
|
||
|
||
|
||
|
||
具体代码就不贴了,可以在 github 上下载代码查看。
|
||
|
||
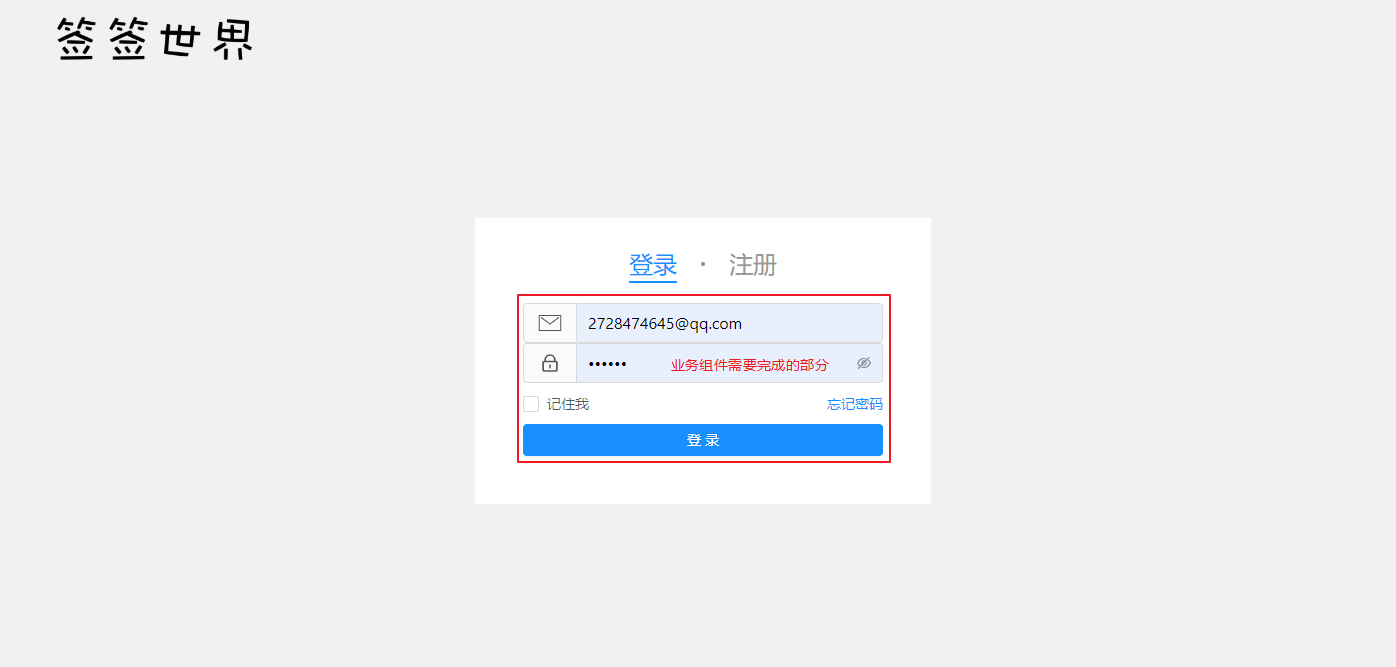
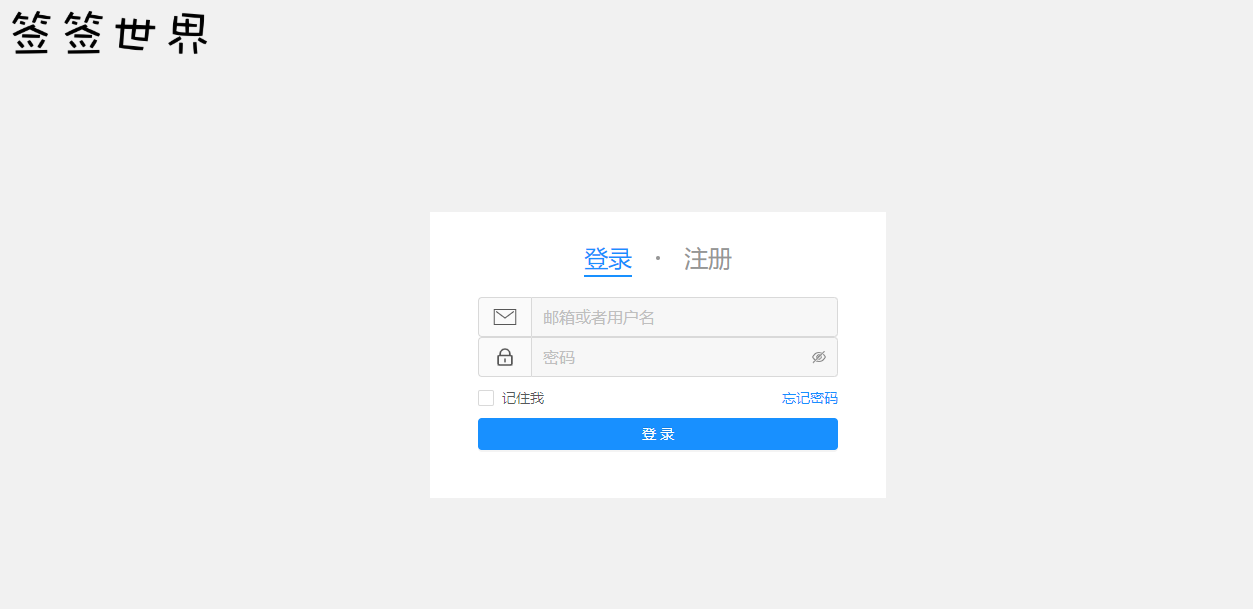
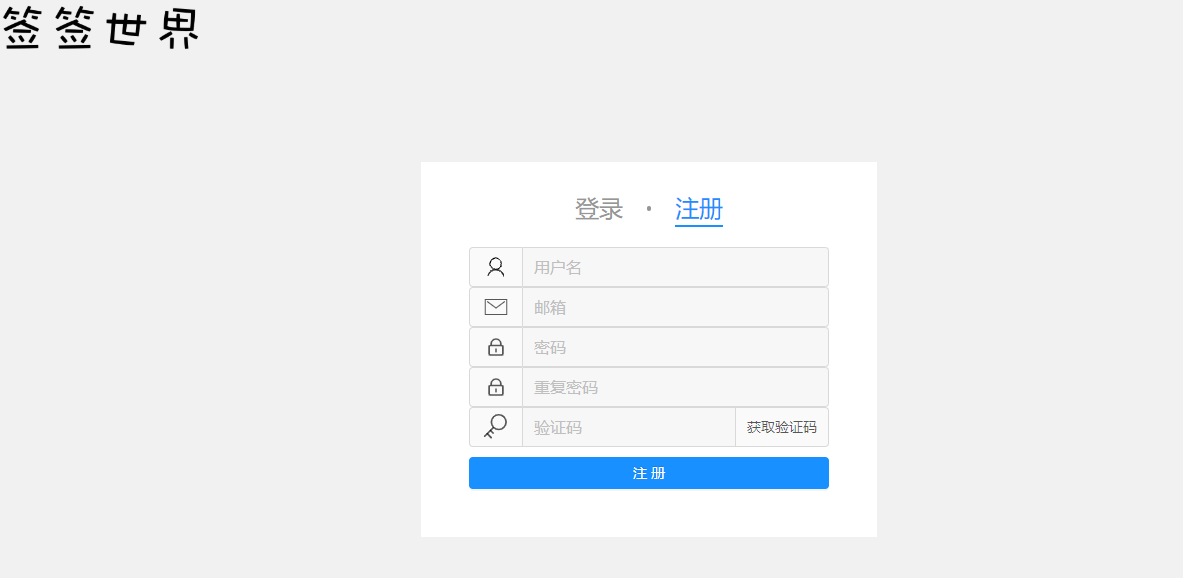
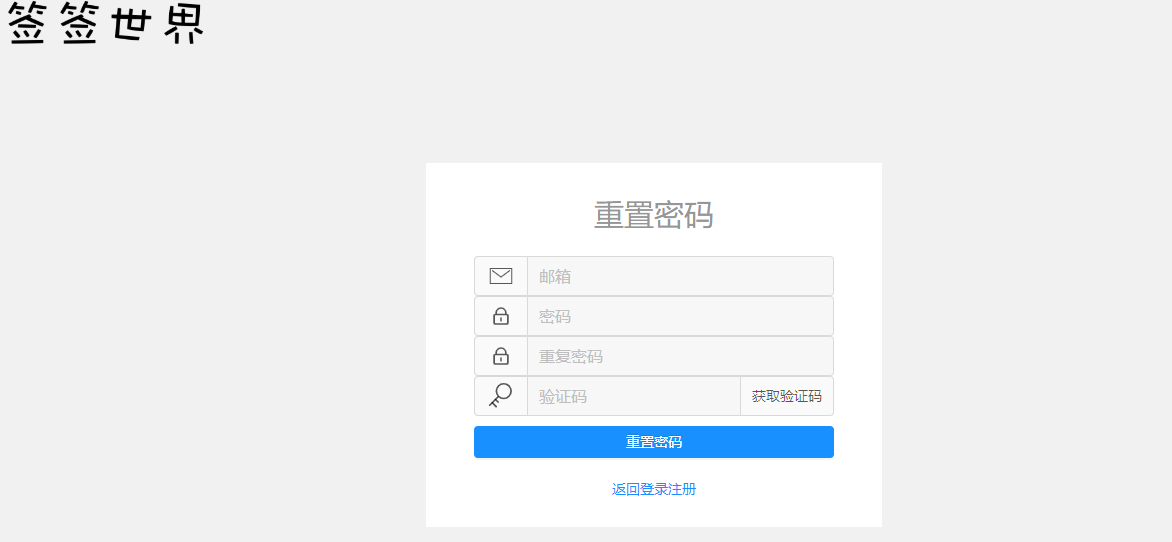
最终 LoginLayout 实现的效果如下:
|
||
|
||
|
||
|
||
在登陆/注册页中只需编写表单部分的核心代码即可。
|
||
|
||
**PS:** http 工具类做了一点修改,主要是数据解析的方式,最初是准备用 http 状态码来当作应用的请求状态码,后面还是决定 http 状态码统一为 200,在返回数据中定义 code 字段表示请求状态。
|
||
|
||
## 编写页面组件
|
||
|
||
不贴整段代码,可以在`front/src/pages/public`目录中查看登录、注册、重置密码组件完整代码。(注册、重置密码共用一个组件).
|
||
|
||
其中比较重要的部分是
|
||
|
||
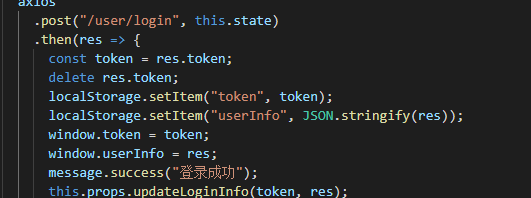
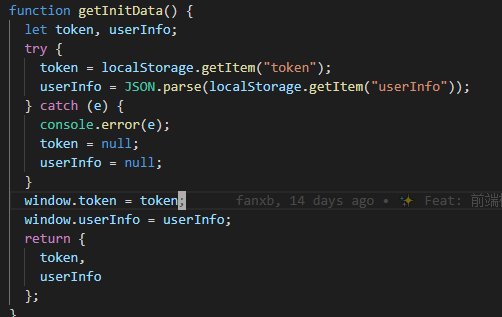
- 缓存登录返回的 token 和用户信息到 localeStore
|
||
|
||
- redux 初始化时从 localeStore 中读取 token 和用户信息放到 redux 中
|
||
|
||
|
||
如何在组件中使用 redux 的方法已经[上一篇](https://blog.fleyx.com/blog/detail/20190626)中说明.
|
||
|
||
## 将页面组件加入到路由中
|
||
|
||
编辑`src/App.jsx`文件。
|
||
|
||
1. 导入组件
|
||
|
||
```javascript
|
||
import Login from "./pages/public/Login";
|
||
import RegisterOrReset from "./pages/public/RegisterOrReset";
|
||
```
|
||
|
||
2. 编写路由
|
||
|
||
```javascript
|
||
<Route exact path="/public/login" component={Login} />
|
||
<Route exact path="/public/register" component={RegisterOrReset} />
|
||
<Route exact path="/public/resetPassword" component={RegisterOrReset} />
|
||
```
|
||
|
||
## 效果
|
||
|
||
最后效果如下:
|
||
|
||
|
||
|
||
|
||
|
||
|
||
|
||
## 结尾
|
||
|
||
作为一个刚开始学习 react 的菜鸟,欢迎各位大牛批评指正。
|
||
|
||
后台代码使用springboot实现,有需要的可以自行查看源码。
|
||
|
||
源码:[github](https://github.com/FleyX/ChatRoom),切换到 tag:`第二篇:第二篇:注册登录重置密码完成`,便可以看到截止到本篇的源码。
|
||
|